How to compress an image to a specific size in KB
Updated
Job sites, visa and exam portals, online shops and email services often accept a photo only if it is smaller than a certain size: 100 KB, 500 KB, 2 MB. A photo from a phone is usually several megabytes, so it gets rejected. You could lower the quality bit by bit, saving and checking the file size over and over, or you can simply tell MediaHuman Compressa the size you need. It finds the best quality that still fits the limit, for one photo or for a hundred at once, and your photos never leave your computer.
This guide uses the Mac version of the program, but the steps on Windows are the same.
-
Add your photos
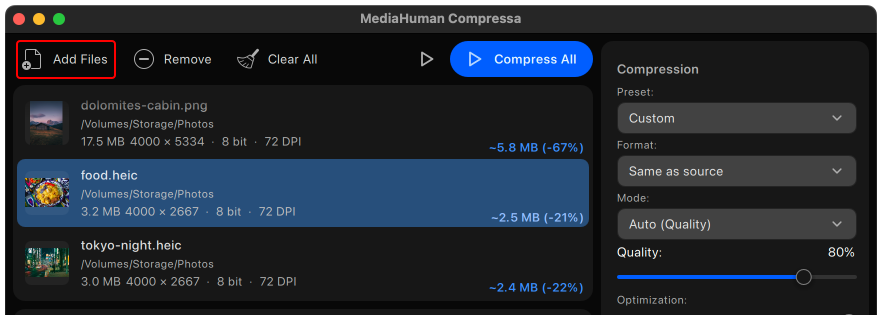
Run Compressa and drag the photos into its window. You can also click Add Files and pick them in the dialog, or drop a whole folder. JPEG, PNG, WebP, HEIC and AVIF are all fine, including HEIC photos straight from an iPhone.
-
Choose Target Size and enter the limit
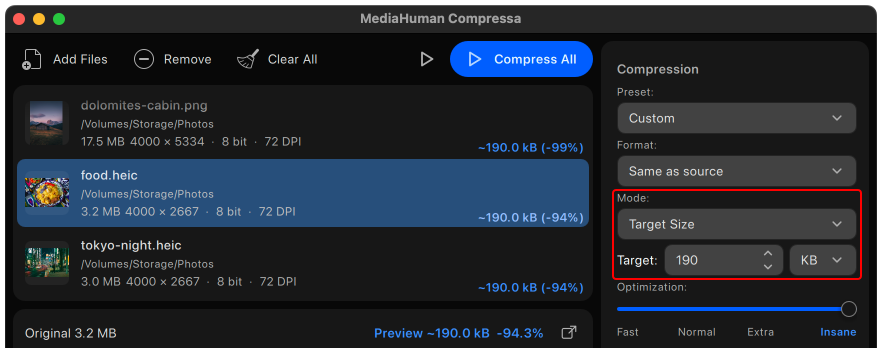
In the Compression section on the right, set Mode to Target Size. In the Target field, type the number and pick the unit next to it: KB or MB. If the site says "up to 200 KB", enter a little less, for example 190 KB, to be on the safe side.
The limit applies to each photo separately: if you add ten photos and enter 200 KB, you get ten files, each one under 200 KB.
-
Pick the format the site expects
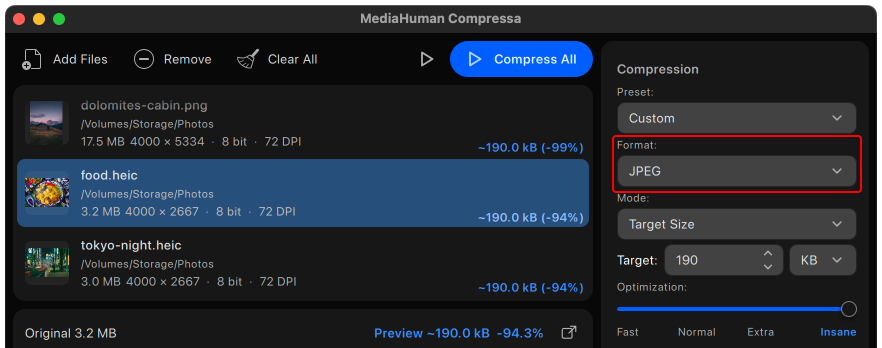
Many forms accept JPEG only. If your photos are HEIC or PNG, set Format to JPEG. If the format doesn't matter, leave Same as source. A PNG screenshot converted to JPEG usually becomes several times smaller, so a strict limit is easier to reach.
-
Make the photo smaller in pixels, if the limit is very small
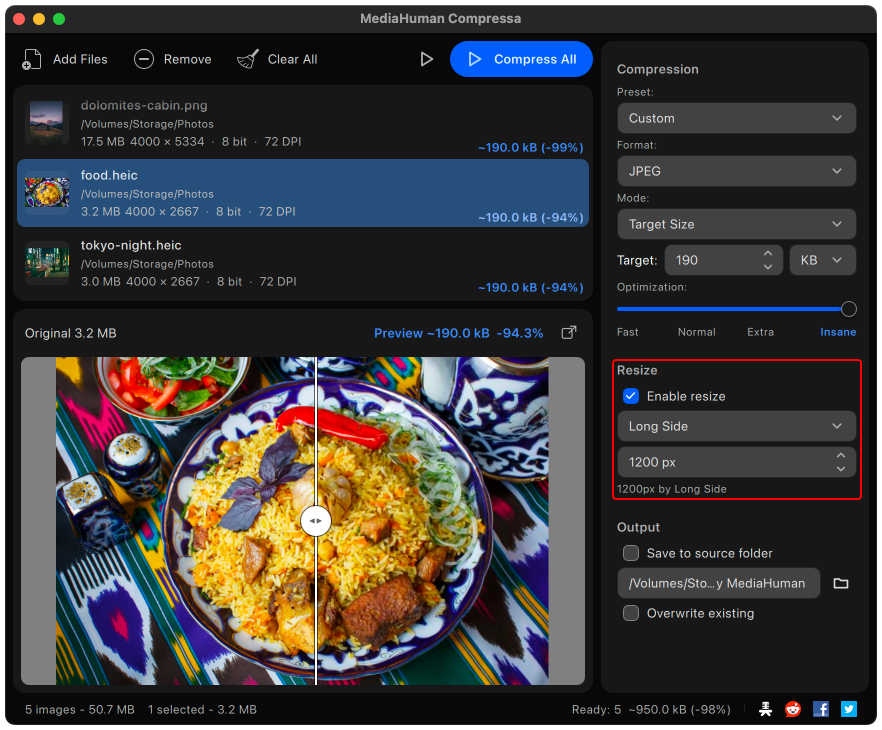
A 12-megapixel photo squeezed into 50 KB will look blurry, because there are simply too many pixels for so few kilobytes. For a small limit, also reduce the picture itself: turn on Enable resize in the Resize section, choose Long Side and enter, for example, 1200 pixels. That is plenty for a profile or ID photo, and the result looks much sharper. Compressa only ever makes images smaller, never larger.
-
Check the result before saving
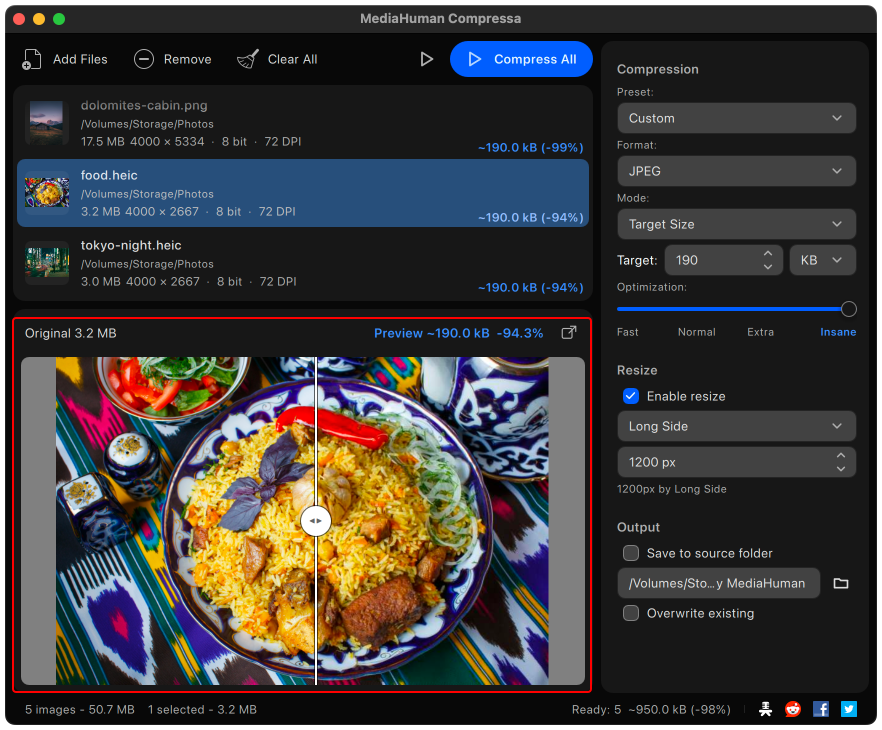
Select a photo in the list and look at the Preview: drag the divider to compare the original and the compressed version side by side, and see the estimated size of the new file. If faces or text look too soft, go back one step and reduce the size in pixels a little more, or ask the site whether a larger file is allowed.
-
Compress and find the files
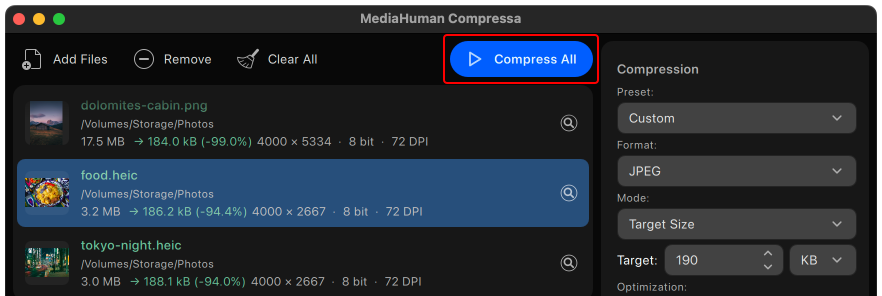
Click Compress All. Next to each photo you see how much it shrank. The new files go to the Compressed by MediaHuman folder inside your Pictures folder, and your original photos stay as they were. To save the files somewhere else, click the folder button in the Output section on the right and pick another folder.


Tip: remove the location before you upload
Phone photos store where they were taken. To keep that to yourself, open Settings and under Metadata turn off GPS location. This also helps with very small limits: the information stored in a photo takes space too, and if Compressa says the target is too small to fit the image's metadata, turn off Keep metadata and compress again.